Using TP-Link Tapo P115 devices safely for automation and monitoring
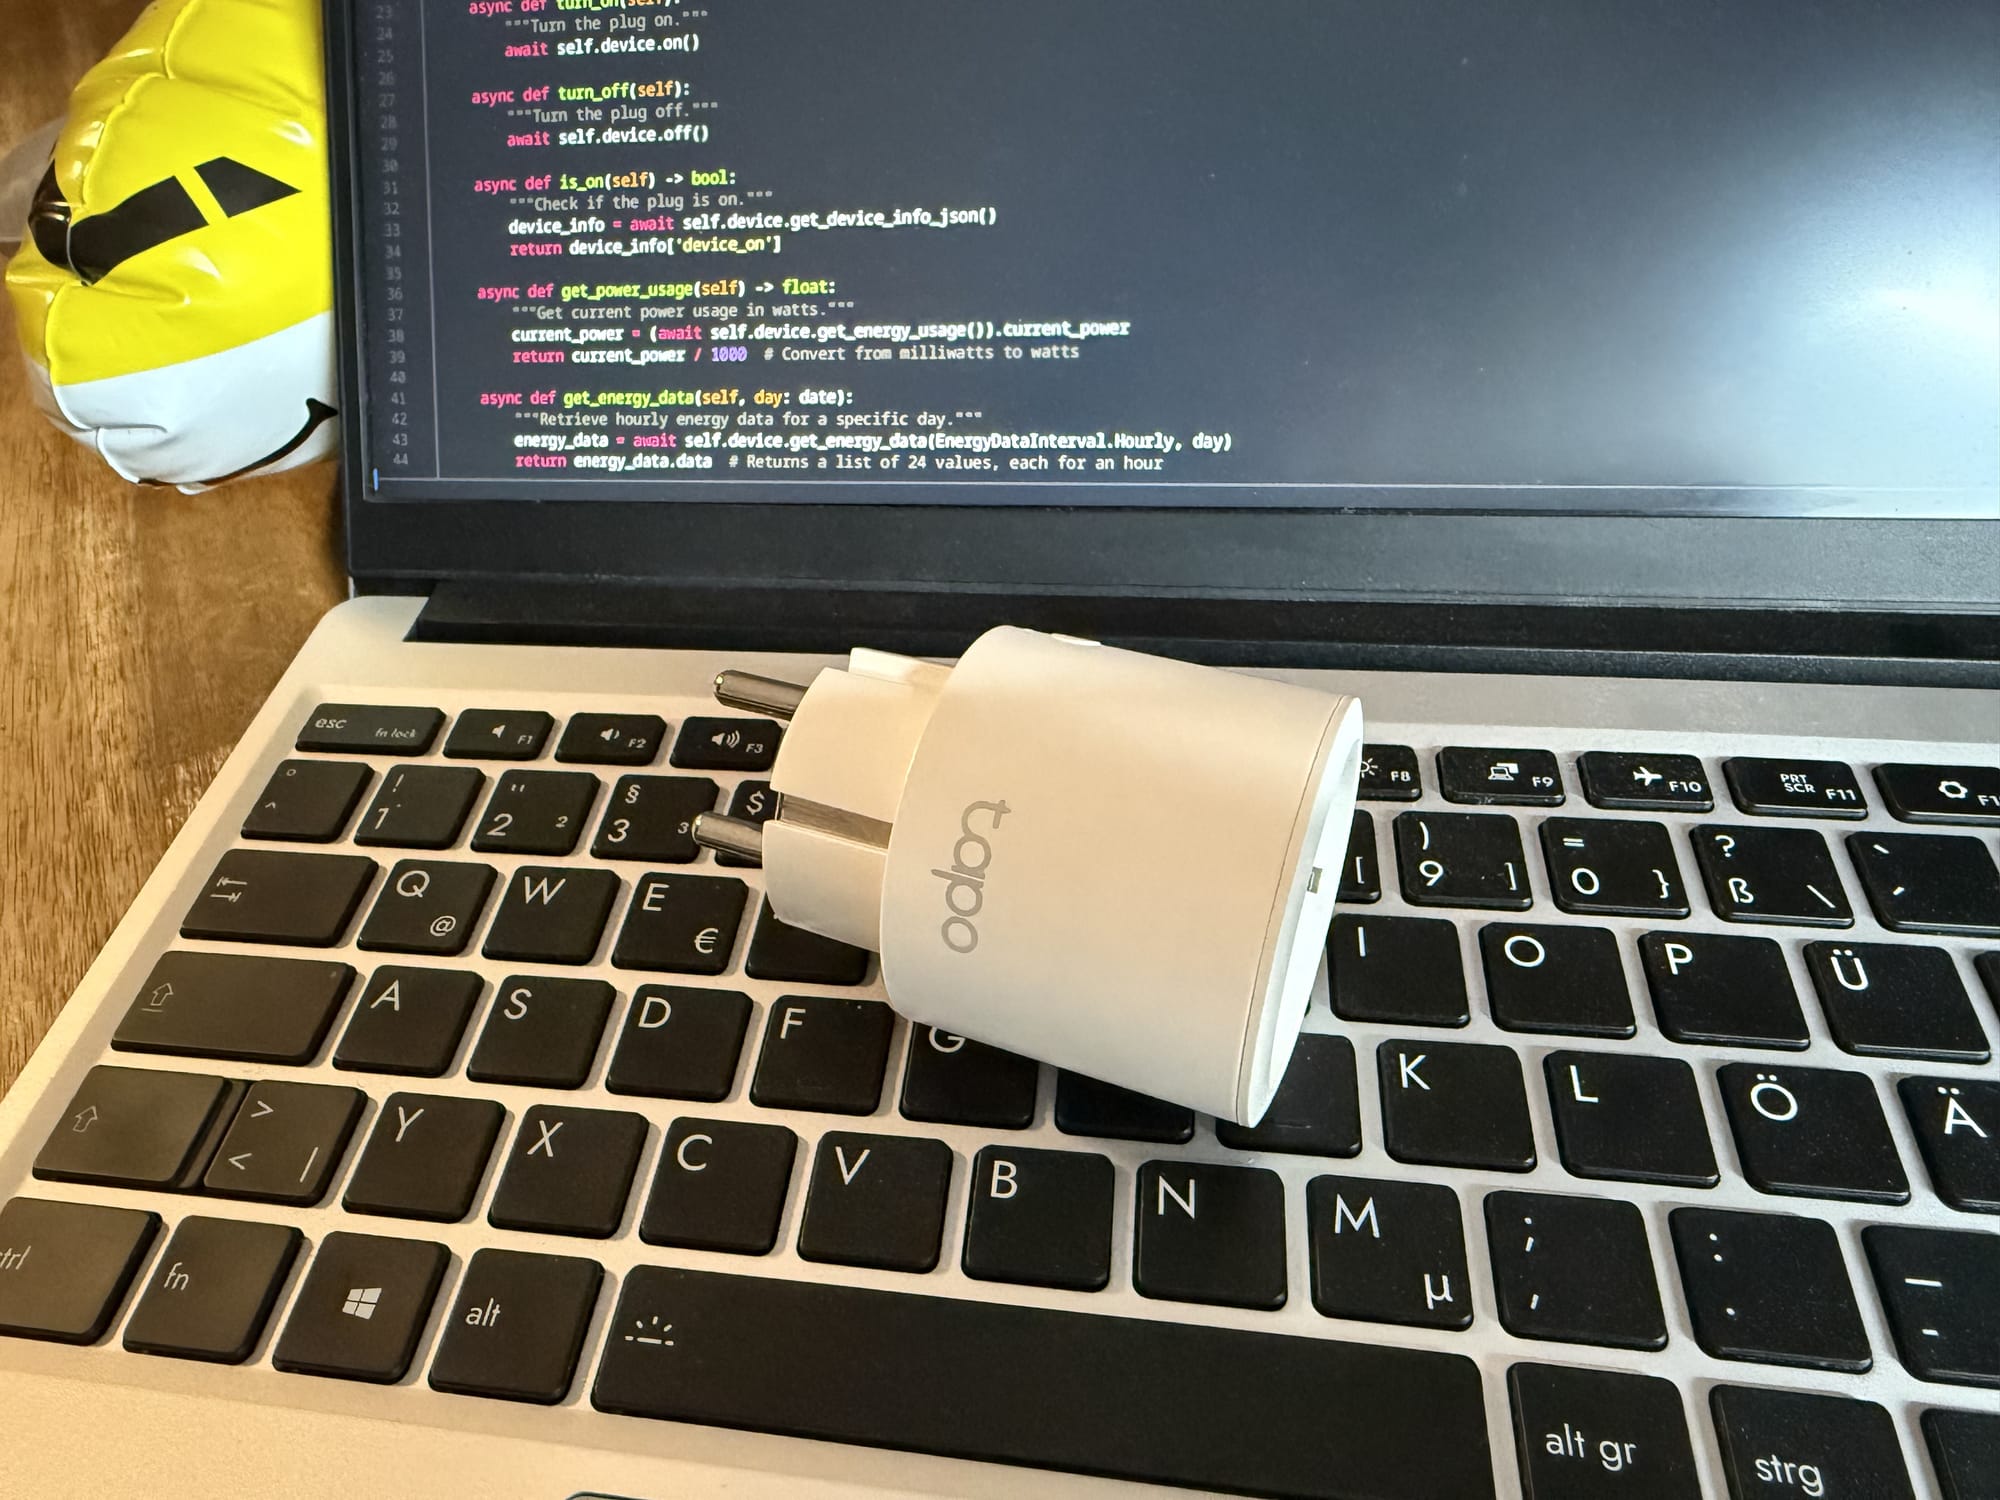
While looking for a solution for controlling and monitoring a specific electronic appliance in my home, I've come across the TP-Link Tapo P115, which promises to be a cheap "smart" plug socket you can control over WiFi. Even though I despise any "smart device" nonsense, this is by far the least expensive way I found for my use case.
First of all, as with probably any smart device, I wouldn't trust the security of the thing as far as I can throw it. There are various reports of vulnerabilities of Tapo devices ([1], [2], [3]), so there is no way that thing will touch my home network.
So, here is what I learned in the process of deploying one of the P115 devices as securely as possible. You can decide for yourself whether that's worth the trouble for you.
1 - Tapo does not like network isolation.
Putting the device into an isolated VLAN is obvious. Reserve a VLAN ID for your IoT stuff and create a separate WiFi network in that VLAN. Do not reuse your normal WiFi password (see the writeup about the password stealing vulnerability). In your router, configure the VLAN to only accept incoming connections from the device you want to control the Tapo device from. Deny any outgoing connections.
Afterwards, the device needs to be initialized (or "provisioned"). I have used the official "Tapo" app, however we will only use it for provisioning, as it won't be able to actually control the device afterwards. You unfortunately have to create a "TP-Link ID" account, but you won't need it after this initial step, so you might want to use a disposable address. In fact, you could create a separate account per device if you wanted.
When initializing the device using the app, tell it to connect to the isolated IoT WiFi network. It will then promptly lose connection, idle for a while, then fail. Why's that? Because TP-Link decided to use a proprietary UDP broadcast protocol instead of Zeroconf to find the device in the new network. While good routers are able to proxy Zeroconf, there's no chance broadcasts will ever be routed between our two networks. That doesn't matter though, as the device is already completely provisioned at that point.
This is the point where we say goodbye to the Tapo app, which is probably for the better. FYI, there seems to be a way to provision device without using the app which I haven't tried, see here.
2 - Tapo does not like being offline.
You might now assume the smart plug tries to connect to some cloud service that's going to be shut down in 3 years, turning your gadget into a paperweight. I have good news for you: It does not. There are two libraries I've found (Tapo and Kasa) which both enable you to completely control and monitor the device within your local network, provided you've configured your router and firewall correctly. I strongly recommend not allowing any IoT device to connect to the Internet, ever.
The libraries will connect to the device using its local IP address (you can get that from your router or separate DHCP server) and your TP-Link ID login data (you used while provisioning it). For the username it expects your TP-Link ID email address.
There is however one caveat, which is that the device still expects some Internet connectivity: It must regularly update its internal clock over NTP. The developers probably hard coded some NTP server URLs as I cannot get DHCP option 42 to work.
If you don't update the clock, it will be reset to the year 2000 at some point. Afterwards, any energy monitoring requests will fail. I've encountered both Tapo(MalformedRequest) and Tapo(-1601) while using the Tapo Python library.
Luckily, there is a way to update the time from the API. Only the Kasa library lets us do this, but it's pretty effortless:
from datetime import datetime
from kasa import Discover, Module

device = await Discover.discover_single(ip_address, username=username, password=password)
await device.update()

time = device.modules.get(Module.Time)
old_time = time.time
local_tz = datetime.now().astimezone().tzinfo
new_time = datetime.now(tz=local_tz)
await time.set_time(new_time)
Afterwards, the monitoring requests start working again. You should do this periodically, otherwise energy usage data will be monitored incorrectly.
Closing thoughts
As an IT guy, I always expect to invest more time and money into my own gadgets as I don't trust mass produced tech, especially if it has some kind of network connectivity. I really wanted to avoid connecting a relay board to a Raspberry Pi, and I'm glad I gave the P115 a chance. I obviously cannot recommend it to anyone who simply wants to control their desk lamp with Siri, as it's still undocumented, proprietary and of questionable software quality.
If you're a nerd like me though, I'd say it's worth giving it a shot. Prepare for some initial configuration hassle though.
As of now, hardware design and build quality of the P115 are still unknown. I might actually buy another one to tear down and load test later.